This is the final article under the same title, guiding you on how to enable Multisite in WordPress.
This guide primarily references insights from https://www.ucloud.cn/yun/117859.html and https://liujia.anqun.org/index.php/archives/1295/.
To get started, log in to your WordPress Dashboard. Navigate to Tools → Network Setup. You should see a screen similar to the one below:
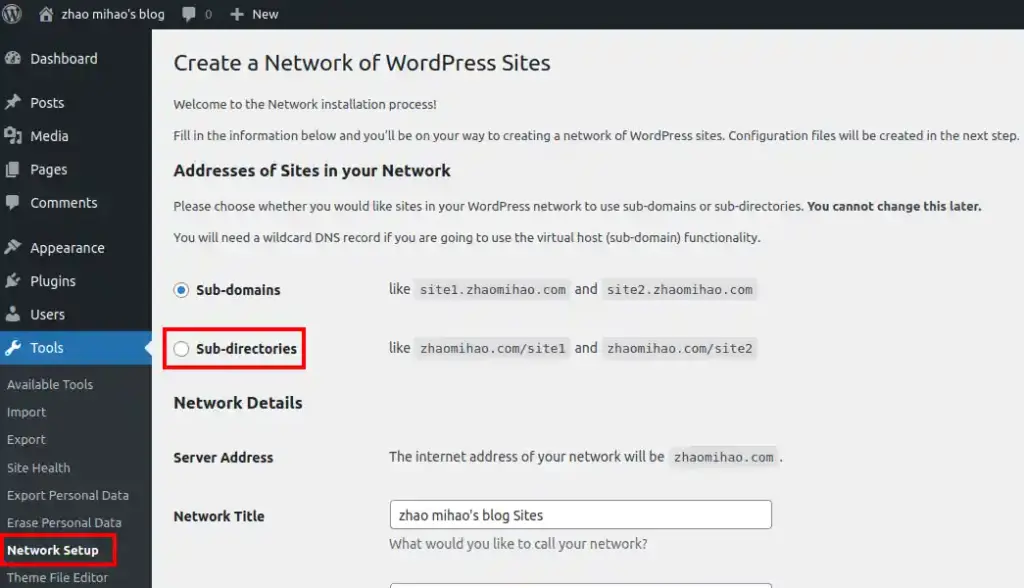
Select Sub-directories and click Install to enable the Multisite feature in WordPress. Afterward, you’ll be presented with a new screen containing specific instructions.
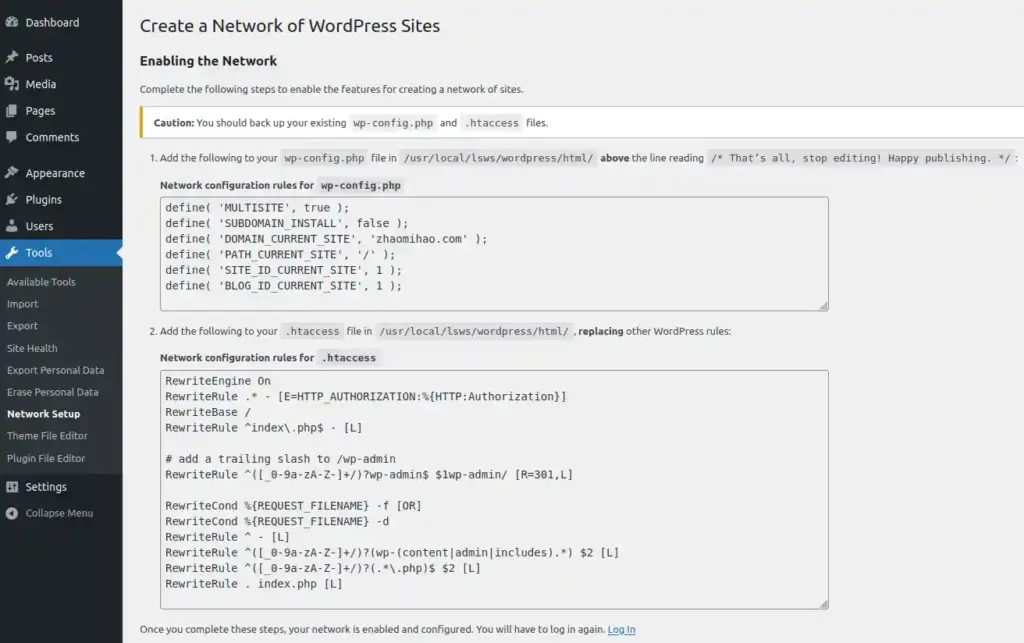
Follow the on-screen prompts carefully:
- Add the first block of code to your
wp-config.phpfile, located in the directory/usr/local/lsws/wordpress/html/, at the specified position. - Replace all existing lines in your
.htaccessfile, also found in/usr/local/lsws/wordpress/html/, with the second block of code provided.
Once the changes are made, refresh your website and log in again.
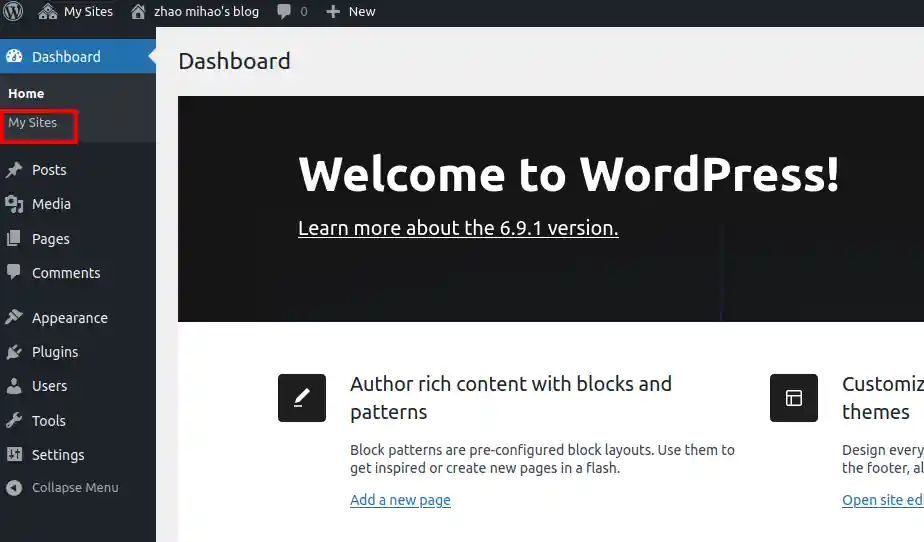
Now, head over to My Sites → Network Admin → Dashboard. If you see a screen resembling the example below, congratulations! You’ve successfully set up WordPress Multisite. You can now start adding new sites to your network.
On a side note, you might be wondering: What’s the point of WordPress Multisite?
In my case, I use it to run both my English and Chinese sites simultaneously from a single WordPress installation.